 Save
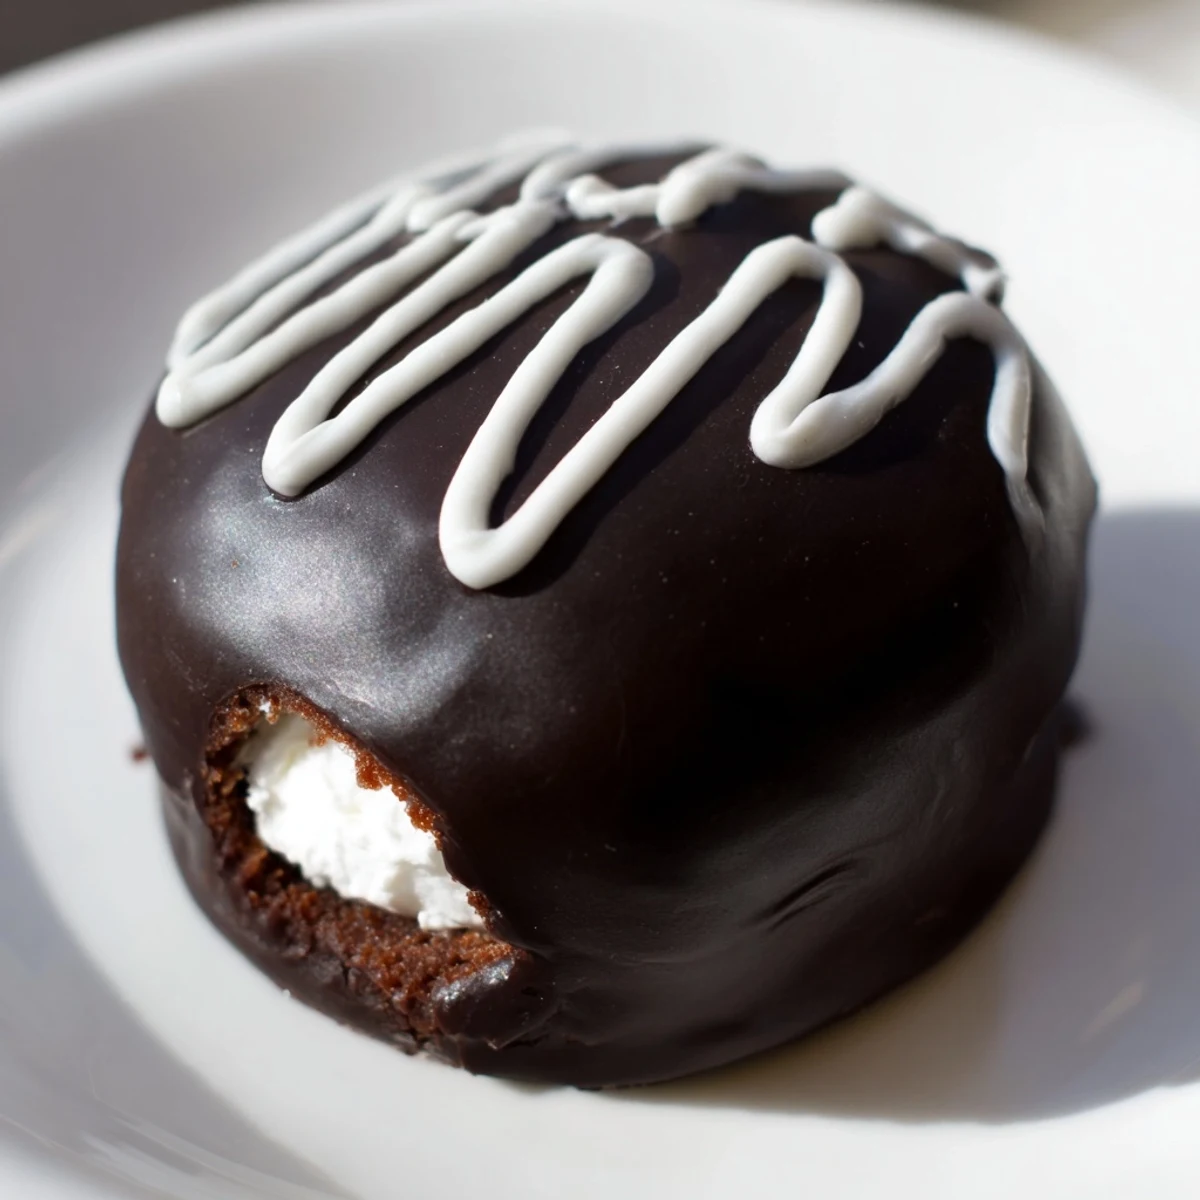
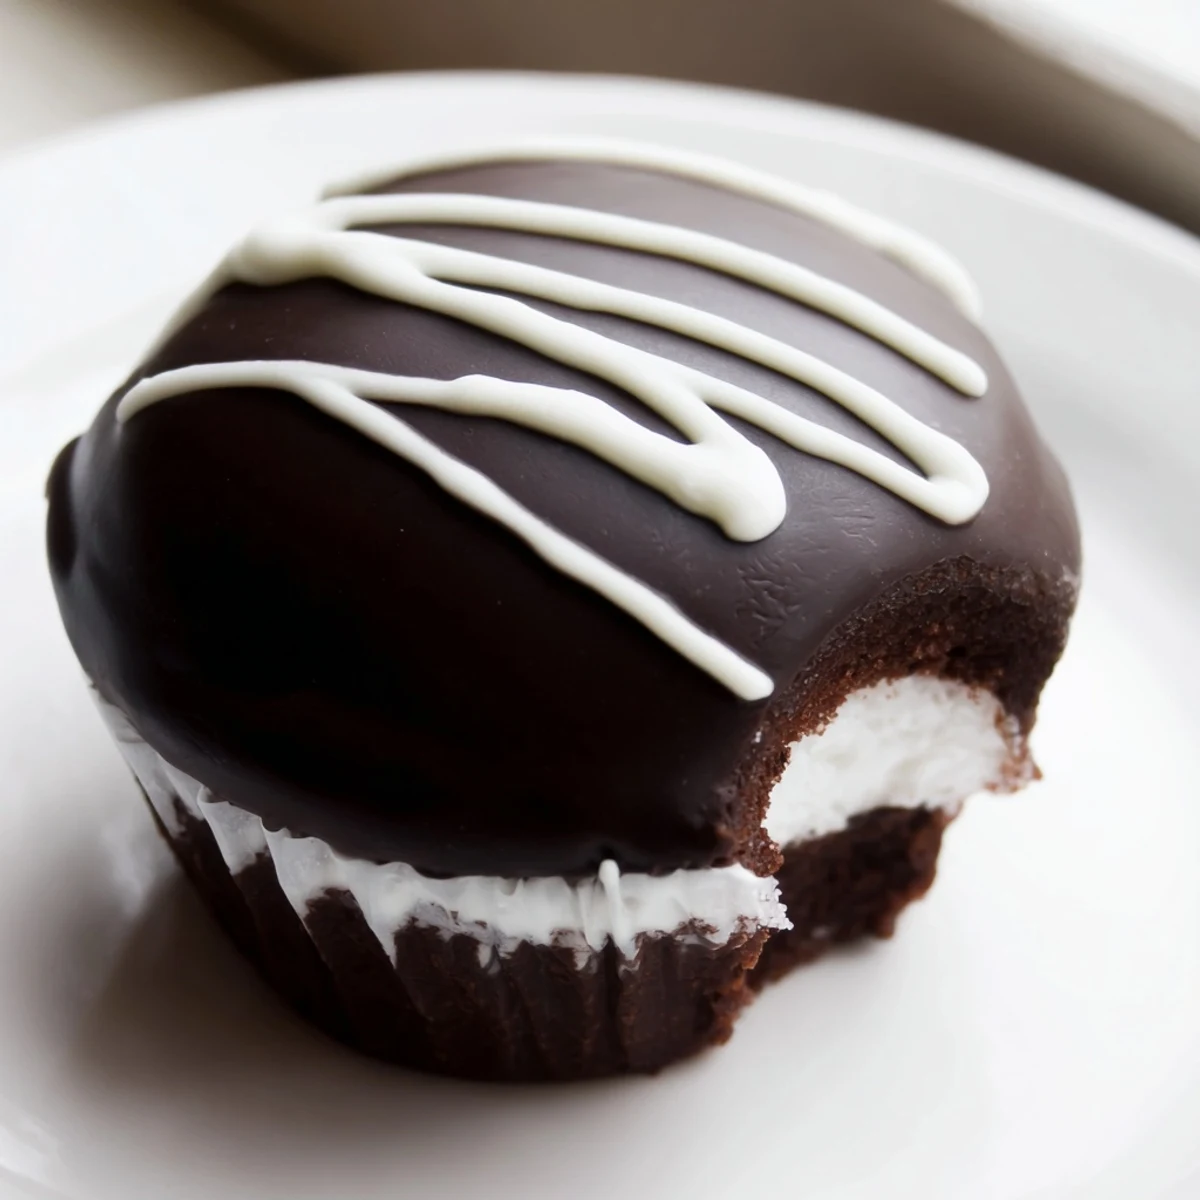
Save These homemade Hostess cupcakes capture everything beloved about the classic snack cake. Moist chocolate cupcakes are baked until tender, then injected with a fluffy marshmallow filling made from butter, powdered sugar, and marshmallow creme.
Each cupcake gets dipped into a rich, glossy chocolate ganache that sets into a smooth shell. The finishing touch is the signature white icing squiggled across the top, instantly recognizable and nostalgic.
While they require a few steps—baking, filling, dipping, and decorating—each component is straightforward. The result is a bakery-worthy treat that surpasses anything from a package.
There is something deeply satisfying about recreating a childhood grocery store staple in your own kitchen, especially when the result tastes ten times better than anything wrapped in cellophane. My obsession with homemade Hostess cupcakes started on a rainy Tuesday when I found myself staring at a boxed version and wondering what would happen if I just made them from scratch. The answer, it turns out, is pure chocolate covered joy. These little cakes have since become my go to whenever I want to impress without stressing out.
I brought a batch of these to a potluck once and watched a grown man eat four of them while pretending to inspect the dessert table. Nobody believed they were homemade until I showed them the slightly messy piping marks on the bottoms. That imperfection, by the way, is exactly the charm of making them yourself.
Ingredients
- All-purpose flour (1 cup, 120 g): The foundation of the cake, sifted well to keep things light and tender.
- Unsweetened cocoa powder (1/2 cup, 45 g): Use a quality brand here because this is where your chocolate flavor lives. Dutch-processed will give you a deeper, richer taste.
- Baking powder (1 tsp): Gives the cupcakes their gentle lift without making them dome too aggressively.
- Baking soda (1/2 tsp): Works alongside the cocoa to keep the crumb soft and balanced.
- Salt (1/4 tsp): A small amount that makes every other ingredient taste more like itself.
- Unsalted butter, softened (1/2 cup, 115 g): Bring it to room temperature so it creams properly with the sugar. Cold butter leaves lumps.
- Granulated sugar (1 cup, 200 g): Sweetens the cake and helps create that fluffy texture when beaten with butter.
- Large eggs (2): Added one at a time so they incorporate smoothly without curdling the batter.
- Vanilla extract (1 tsp): Rounds out the chocolate flavor beautifully. Use pure extract if you can.
- Whole milk (1/2 cup, 120 ml): Adds moisture and a subtle richness that water alone cannot achieve.
- Hot water (1/2 cup, 120 ml): Bloom the cocoa and thin the batter just enough for that perfect velvety crumb.
- Marshmallow creme (1 cup, 100 g): The soul of the filling. Look for jars labeled marshmallow fluff near the peanut butter aisle.
- Powdered sugar (1 cup, 120 g for filling, plus 1/4 cup, 30 g for swirl): Sweetens the filling and creates the classic white squiggle on top.
- Heavy cream (1/2 cup, 120 ml): The liquid gold that transforms chopped chocolate into something pourable and glossy.
- Semi-sweet chocolate, chopped (4 oz, 115 g): Chop it small so it melts evenly when the hot cream hits it.
- Whole milk for swirl (1 tsp): Just enough to thin the powdered sugar into a pipeable icing.
Instructions
- Preheat and prep:
- Set your oven to 350 degrees F (175 degrees C) and line a 12-cup muffin tin with paper liners. This is the part where you also clear your counter space because things are about to get wonderfully messy.
- Whisk the dry team:
- Sift the flour, cocoa powder, baking powder, baking soda, and salt together in a medium bowl. Take a moment to appreciate how dramatic dark cocoa powder looks against white flour. Set this aside.
- Cream butter and sugar:
- In a large bowl, beat the softened butter and granulated sugar with an electric mixer until the mixture looks pale and cloud-like, about three minutes. Add the eggs one at a time, mixing well after each, then stir in the vanilla until everything smells like a bakery.
- Build the batter:
- Add the flour mixture in three parts, alternating with the milk, mixing just until each addition disappears. Stir in the hot water last and watch the batter transform into something glossy and pourable. Do not overmix or your cupcakes will be dense instead of tender.
- Bake and cool:
- Divide the batter evenly among the liners, filling each about two-thirds full. Bake for 18 to 20 minutes until a toothpick inserted in the center comes out clean. Let them cool completely in the pan before you even think about filling them.
- Whip the filling:
- Beat the butter and powdered sugar together until fluffy and pale. Add the marshmallow creme and vanilla, then whip until smooth and spreadable. It should taste like a cloud made of sugar and happiness.
- Fill the cupcakes:
- Transfer the filling to a piping bag fitted with a small round tip. Gently insert the tip into the center of each cooled cupcake and squeeze until you feel a slight bulge. Save a small amount of filling if you want to use it for the white swirl later.
- Make the ganache:
- Heat the heavy cream in a small saucepan until it steams but does not boil. Pour it over the chopped chocolate in a bowl, let it sit undisturbed for two minutes, then stir gently until you have a silky, glossy ganache. Let it cool for about five minutes so it thickens slightly.
- Dip and set:
- Carefully dip the top of each filled cupcake into the ganache, rotating slightly for even coverage. Set them aside for about ten minutes until the chocolate sets into a beautiful shell.
- Pipe the iconic swirl:
- Mix the powdered sugar and milk into a thick but pipeable icing. Spoon it into a small piping bag or zip-top bag with a tiny corner snipped off. Pipe loose squiggles across the top of each cupcake, trying not to overthink it. The charm is in the imperfection.
 Save
Save The moment these cupcakes truly won me over was when my neighbor's daughter asked if I worked in a bakery after tasting one at a block party. She was eight and utterly convinced, which remains one of the finest compliments I have ever received.
Storage and Make-Ahead Wisdom
You can bake the cupcakes a day ahead and store them unfilled in an airtight container at room temperature. Fill and dip them the day you plan to serve for the best texture contrast between the soft cake and the snappy ganache shell. Once assembled, they hold up well covered on the counter for up to three days, though they rarely last that long.
Essential Tools for the Job
A standard 12-cup muffin tin, a couple of mixing bowls, and an electric mixer will carry you through most of this recipe. The real MVP is a piping bag with a small round tip for injecting that marshmallow center precisely where it belongs. A fine mesh sieve or sifter makes the dry ingredient step effortless and prevents those dreaded cocoa lumps.
Getting Creative with Variations
Once you master the classic version, this recipe is a playground for small tweaks and personal touches. Try swapping the marshmallow filling for peanut butter buttercream or adding a drop of peppermint extract to the ganache during the holidays. The white swirl on top can also be tinted with food coloring for birthdays or themed parties.
- Espresso powder added to the batter intensifies the chocolate without adding any coffee flavor.
- A sprinkle of flaky sea salt on the ganache before it sets adds a sophisticated crunch.
- Always taste your ganache before dipping because chocolate quality makes or breaks the final result.
 Save
Save These cupcakes are proof that a little effort and a lot of butter can recreate something magical right in your own kitchen. Share them generously, because watching someone bite into that marshmallow center for the first time is the whole reward.
Common Recipe Questions
- → How do I get the marshmallow filling inside the cupcakes?
-
Use a piping bag fitted with a small round tip. Insert the tip directly into the center of each cooled cupcake top and gently squeeze to fill. You'll feel the cupcake expand slightly as the filling goes in.
- → Can I make these cupcakes ahead of time?
-
Yes, the cupcakes can be baked a day in advance and stored in an airtight container. For the best texture and presentation, fill and dip them in ganache on the day you plan to serve.
- → What type of cocoa powder works best?
-
Natural unsweetened cocoa powder works well, but Dutch-processed cocoa will give you a deeper, richer chocolate flavor and darker color. Either will work in this batter.
- → Why does the batter include hot water?
-
Hot water helps bloom the cocoa powder, intensifying its chocolate flavor. It also thins the batter to a silky consistency, which produces a tender, moist crumb in the finished cupcakes.
- → How should I store finished Hostess cupcakes?
-
Store them covered at room temperature for up to three days. Avoid refrigerating, as the ganache can dull and the cupcakes may dry out. If your kitchen is very warm, a cool spot away from direct sunlight is ideal.
- → Can I use a different filling instead of marshmallow?
-
Absolutely. Whipped vanilla buttercream, cream cheese filling, or even a chocolate mousse would work well. Keep in mind the marshmallow creme is what gives these their authentic Hostess flavor and texture.
