 Save
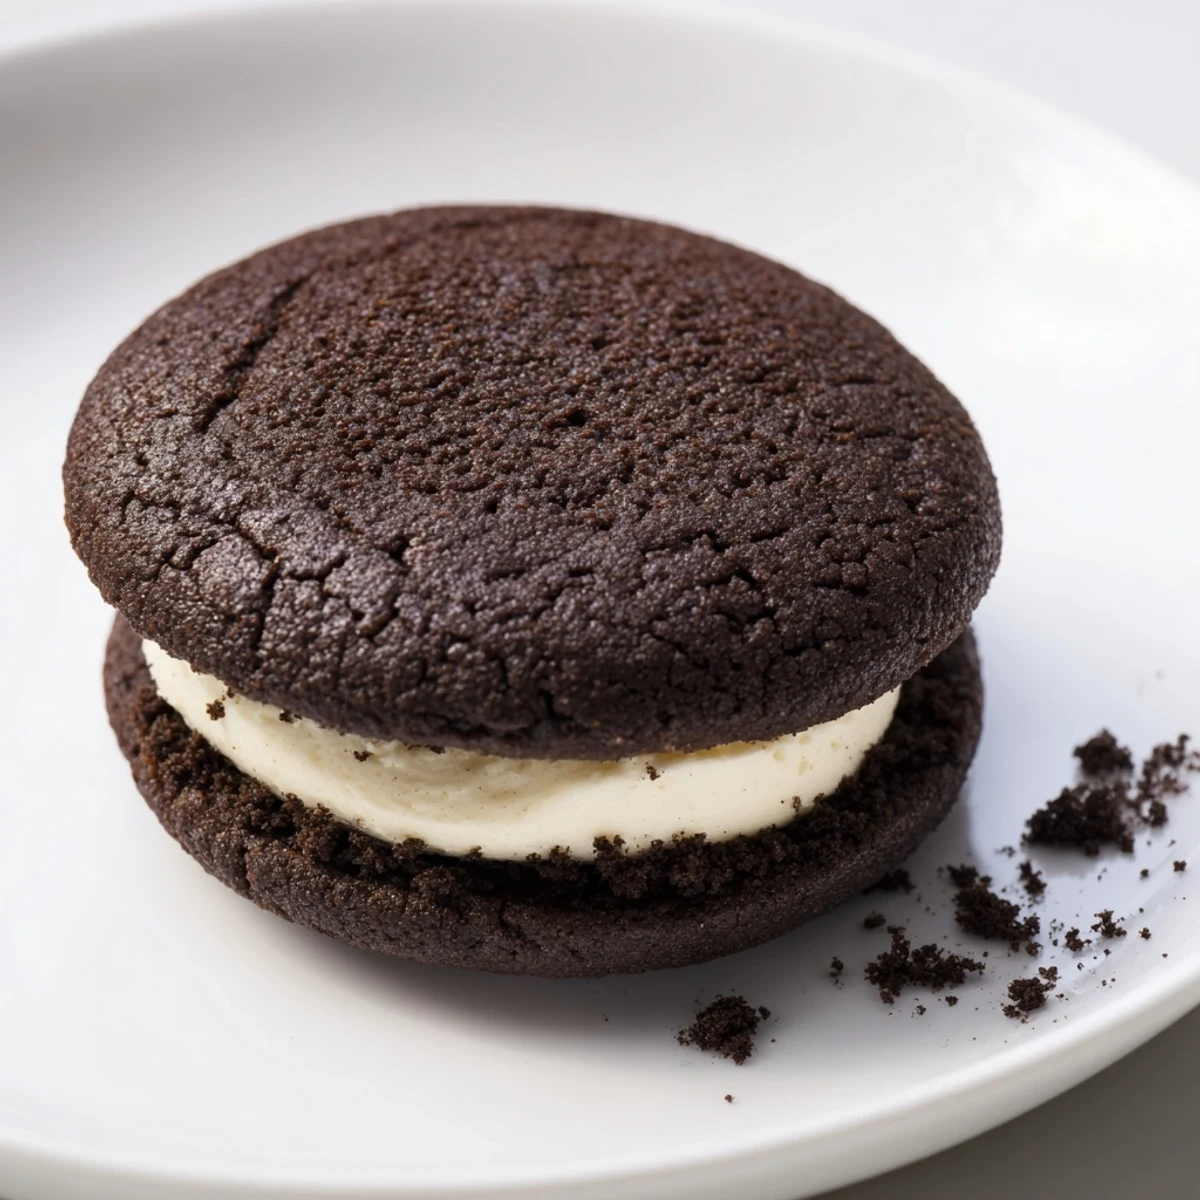
Save These classic dark chocolate sandwich cookies pair crisp, cocoa-rich rounds with a silky vanilla cream. The dough is mixed until stiff, shaped into 1-inch balls, and baked 10–12 minutes until set; cool on the sheet briefly before transferring to a rack.
Assemble by piping or spreading about 1 tablespoon of filling and pressing gently to the edge. Yield about 18 sandwiches, total time ~1 hour. Try 1 tsp espresso powder for deeper chocolate or swap shortening for extra butter in the filling for a richer mouthfeel.
The smell of dark cocoa hitting a hot oven is something that never leaves you once you have experienced it at home rather than from a store package. My kitchen looked like a chocolate bomb had gone off the first time I attempted these, with cocoa dust on the counter, the floor, and somehow my forehead. That mess was worth every single second once I bit into a still warm cookie sandwich that put anything from a plastic sleeve to shame. These homemade versions are darker, more intense, and endlessly customizable.
I brought a tray of these to a friend's birthday picnic last summer and watched three adults quietly abandon conversation to reach for seconds before anyone else could claim them. There is something about a homemade sandwich cookie that makes people momentarily forget their manners, and honestly I respect that completely.
Ingredients
- All purpose flour (1 cup, 125 g): Provides the structural backbone, and spooning it into the cup rather than scooping prevents dense cookies.
- Unsweetened Dutch process cocoa powder (¾ cup, 70 g): This is what gives the cookies their deep, nearly black color and smooth chocolate flavor without bitterness.
- Granulated sugar (1 cup, 200 g): Essential for the crisp edges and that satisfying snap when you break a cookie in half.
- Baking soda (½ tsp): A small amount that helps the cookies spread just enough without puffing up.
- Salt (¼ tsp): Balances the sweetness and makes the chocolate taste more like itself.
- Unsalted butter, softened (½ cup, 115 g): Room temperature butter creams properly, which is the difference between greasy and tender cookies.
- Large egg (1): Binds everything together and adds richness to the dough.
- Vanilla extract (1 tsp for dough, 1 tsp for filling): Use the real thing if you can, because imitation vanilla sticks out in a recipe this simple.
- Vegetable shortening (¼ cup, 55 g, for filling): This keeps the filling stable and smooth at room temperature, just like the cookies you grew up with.
- Powdered sugar, sifted (1½ cups, 180 g, for filling): Sifting is nonnegotiable here unless you enjoy lumpy filling.
- Pinch of salt (for filling): A tiny pinch in the cream makes it taste less like frosting and more like something you cannot stop eating.
Instructions
- Get your oven ready:
- Preheat to 350°F (175°C) and line two baking sheets with parchment paper. Listen for that quiet pop of the oven coming to temperature while you gather everything else.
- Whisk the dry goods:
- Sift the flour, cocoa powder, baking soda, and salt together in a medium bowl. Take a moment to appreciate how impossibly dark and velvety the cocoa looks once it is aerated.
- Cream the butter and sugar:
- Beat the softened butter and granulated sugar in a large bowl until the mixture turns noticeably lighter in color and looks fluffy. Scrape the bowl down once, then add the egg and vanilla, beating until everything is homogeneous and smooth.
- Bring the dough together:
- Add the dry ingredients gradually to the wet mixture, mixing on low until a stiff, slightly crumbly dough forms that holds together when you squeeze it. If it feels too dry, let the mixer run another 30 seconds and it will come around.
- Shape the cookies:
- Roll tablespoon sized portions into one inch balls and place them two inches apart on the prepared sheets. Flatten each ball gently with the palm of your hand or the bottom of a glass dipped in cocoa powder for a clean finish.
- Bake and cool:
- Bake for 10 to 12 minutes until the tops look set and feel just barely firm when tapped. Let them rest on the sheet for five minutes before moving to a wire rack, because they are fragile and will crack if rushed.
- Make the cream filling:
- Beat the butter, shortening, sifted powdered sugar, vanilla, and salt together until the mixture turns pale, fluffy, and completely smooth. Stop and taste it, because this is the moment where you decide if it needs another pinch of salt.
- Assemble the sandwiches:
- Pipe or spread roughly one tablespoon of filling onto the flat side of half the cooled cookies. Top with the remaining cookies and press gently until the cream reaches the edges, then let them set for 10 to 15 minutes before serving.
 Save
Save My nephew once held one of these up to the light and said with absolute seriousness that no cookie should be this dark. He ate four of them before dinner anyway, and I have never felt more understood as a baker.
Storage and Shelf Life
These cookies stay remarkably good in an airtight container at room temperature for up to five days, and the filling actually settles into a creamier texture after the first day. If you want them to last longer, freeze the unassembled cookies for up to a month and make the filling fresh when you are ready to serve.
Tools That Make This Easier
An electric mixer saves your arm from the stiff dough, though a sturdy spoon and some determination will work too. Parchment paper is essential rather than optional here, because cocoa rich cookies stick aggressively to bare metal pans. A piping bag for the filling looks professional, but a zip top bag with a corner snipped off does the job beautifully.
A Few Last Thoughts
The best part of making these at home is that you get to decide how thick the filling layer is, and I will never judge you for going overboard. These were made for dunking, sharing, and quietly hoarding.
- Dip the assembled cookies in melted chocolate for an extra indulgent version that disappears twice as fast.
- Try peppermint extract in the filling during the holidays for a variation that feels entirely new.
- Always let the cookies cool completely before assembling, or the filling will melt into a sad puddle.
 Save
Save Every batch teaches you something small, whether it is how the dough should feel in your hands or exactly how long your oven truly takes. These cookies are worth every dusty counter and chocolate smeared moment along the way.
Common Recipe Questions
- → How do I get crisp edges but a tender center?
-
Beat butter and sugar until light to incorporate air, shape uniform 1-inch balls and flatten slightly so edges bake quicker than centers. Remove when cookies are set but still slightly soft; they firm up as they cool for tender centers and defined edges.
- → How can I intensify the chocolate flavor?
-
Add 1 teaspoon of espresso powder to the dough to boost chocolate notes without adding coffee taste, or use a darker Dutch-process cocoa for deeper color and richness.
- → What's the best way to pipe the filling neatly?
-
Use a piping bag fitted with a small round tip or a zip-top bag with a corner snipped. Chill the filling briefly if it's too soft; firmer filling gives cleaner sandwiches and neater edges.
- → How should I store these to keep texture?
-
Store in an airtight container at room temperature up to 5 days. Layer with parchment to prevent sticking. If your kitchen is warm, refrigerate and bring to room temperature before serving to restore the filling's softness.
- → Can I replace shortening in the filling?
-
Yes. Substitute equal parts softened butter for shortening for a richer, more flavorful cream. Note butter-based fillings may be softer at room temperature, so chill briefly if needed.
- → Any allergy-friendly swaps?
-
For dairy-free versions, use plant-based margarine and dairy-free powdered sugar substitutes, and check labels for cross-contact with nuts. For an egg-free dough, use a commercial egg replacer or a flax egg, though texture may vary slightly.
