 Save
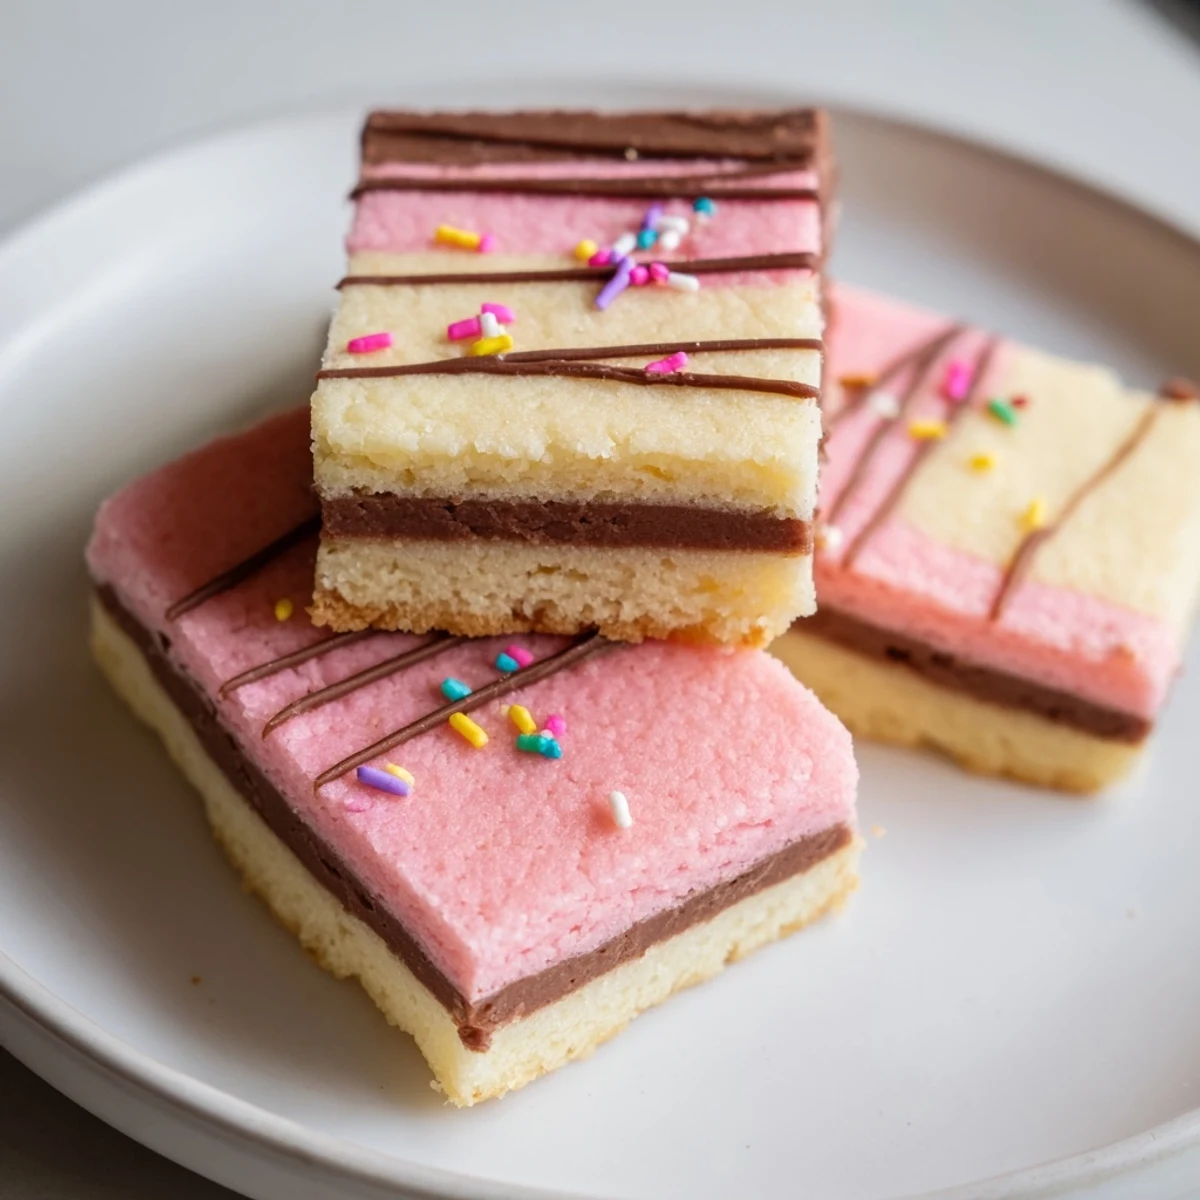
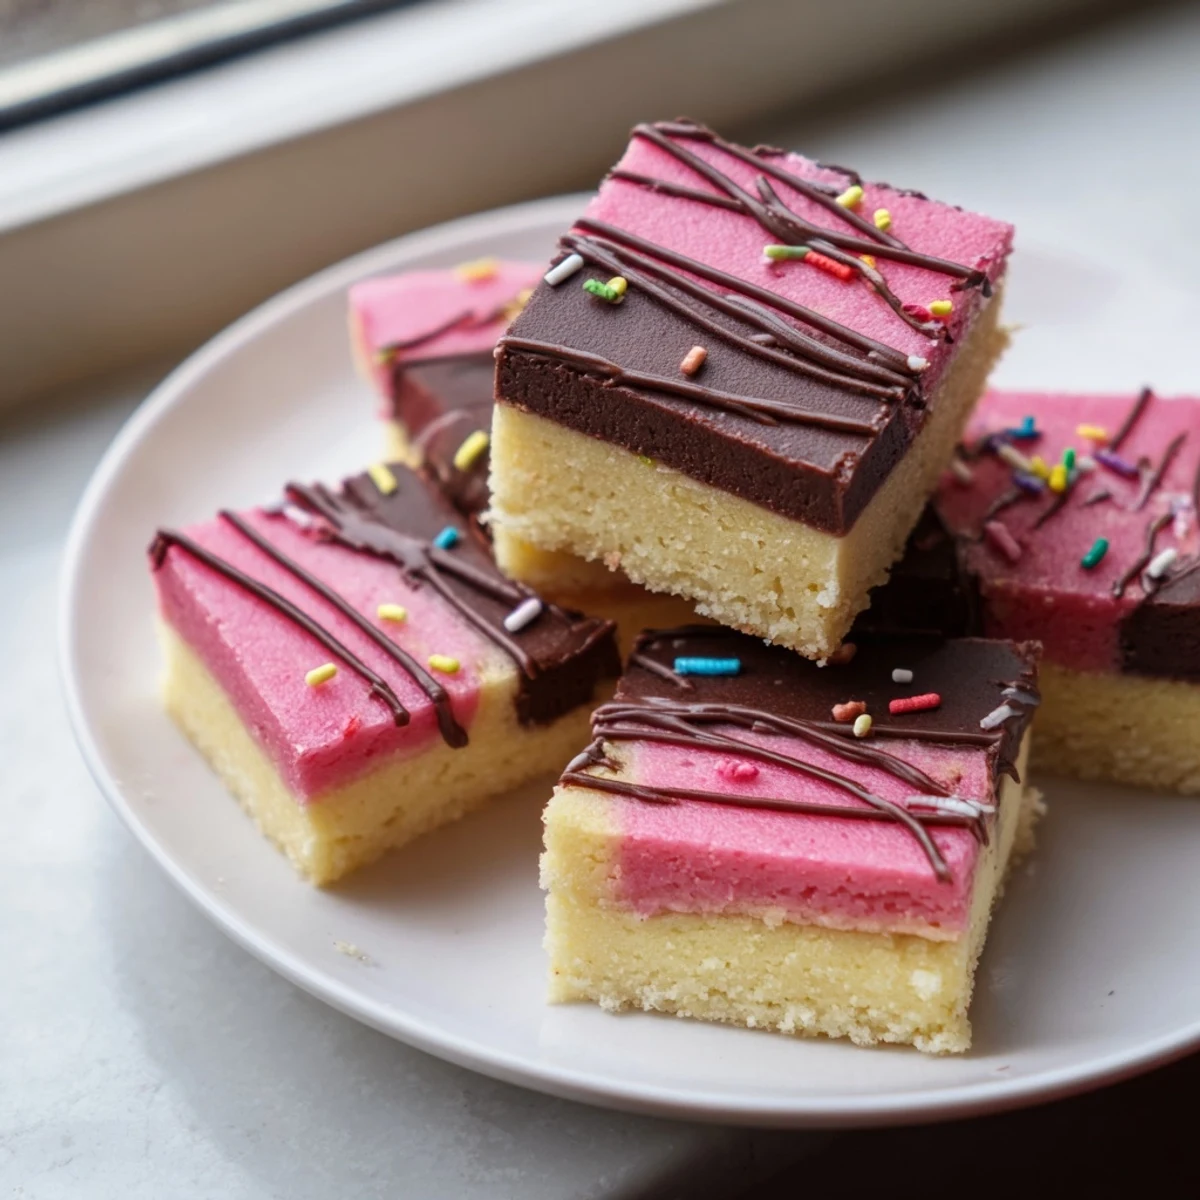
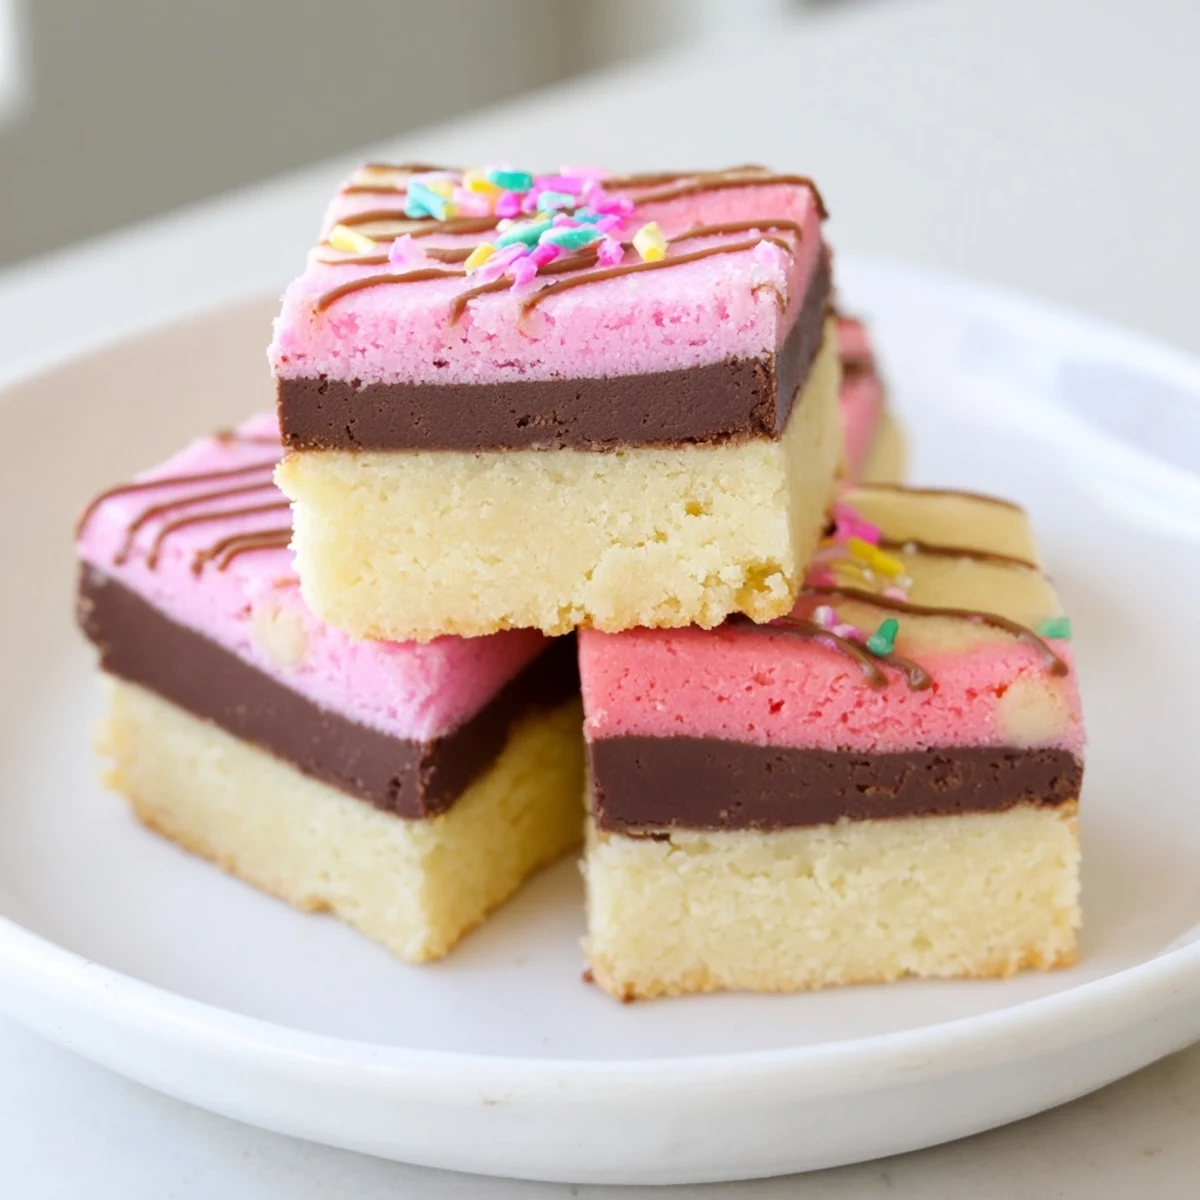
Save Neapolitan cookies bring together three classic flavors—rich chocolate, smooth vanilla, and sweet strawberry—in beautifully layered bars. Each batch delivers a stunning visual effect with minimal effort.
The dough is divided into three portions, each flavored and colored separately, then pressed into layers in a single pan before baking. Once cooled, they're sliced into individual squares that showcase all three flavors.
Perfect for bake sales, holiday platters, or afternoon treats, these cookies store well in an airtight container for up to five days. Customize the colors for different occasions or add a chocolate drizzle for an extra indulgent finish.
The kitchen smelled like three different bakeries fighting for attention, and honestly, that is exactly what Neapolitan cookies do best. Chocolate, vanilla, and strawberry all stacked together in one cheerful little bar. My sister walked in while I was pressing the third layer into the pan and asked if I was making a cake or a science project. I told her it was both, and she grabbed a fork to wait by the oven.
I brought a tray of these to a neighborhood potluck last spring and watched a woman actually gasp when she cut into the first square. She thought they were plain sugar cookies until the tri colored interior revealed itself. That tiny moment of surprise made the entire hour of layering dough feel completely worthwhile.
Ingredients
- Unsalted butter (225 g, softened): Room temperature butter creams smoothly with sugar and creates the tender crumb that holds all three layers together without crumbling apart.
- Granulated sugar (300 g): This amount gives the cookies a pleasant sweetness that balances the cocoa without overpowering the delicate strawberry layer.
- Large eggs (2): Adding them one at a time ensures proper emulsification so your dough stays silky rather than curdled.
- Vanilla extract (1 tsp): The backbone flavor for the vanilla layer and a quiet enhancer running through all three sections of the dough.
- All purpose flour (340 g): Measured properly by spooning and leveling, it provides structure without making the bars dense or heavy.
- Baking powder (1/2 tsp): Just enough lift to keep the layers soft and slightly cakey rather than flat and brick like.
- Fine salt (1/2 tsp): Salt sharpens every flavor here, especially the chocolate, and prevents the bars from tasting one dimensionally sweet.
- Unsweetened cocoa powder (2 tbsp): Adds genuine chocolate depth to that layer without extra fat or sweetness throwing off the texture.
- Strawberry extract (1/2 tsp): A small amount delivers concentrated berry flavor that survives baking beautifully.
- Pink or red food coloring (gel preferred): Gel coloring gives vivid results with just a few drops and will not thin your dough the way liquid can.
- Semisweet chocolate (100 g, melted, optional): A drizzle on top adds a professional finish and an extra hit of richness.
- Sprinkles or chopped nuts (optional): Pure decoration, but they make each square look like it came from a bakery case.
Instructions
- Preheat and prepare the pan:
- Set your oven to 175 degrees Celsius (350 degrees Fahrenheit) and line a 23 by 33 centimeter baking pan with parchment paper, leaving generous overhang on the sides so you can lift the whole slab out cleanly later.
- Cream butter and sugar:
- Beat the softened butter and granulated sugar together in a large bowl until the mixture turns pale, light, and visibly fluffy, which usually takes about three minutes with an electric mixer on medium speed.
- Add eggs and vanilla:
- Drop in one egg at a time, beating well after each addition until fully incorporated, then pour in the vanilla extract and mix until the batter looks smooth and cohesive.
- Incorporate the dry ingredients:
- Whisk the flour, baking powder, and salt together in a separate bowl, then gradually add this mixture to the wet ingredients, stirring gently until a soft, uniform dough comes together without any dry streaks remaining.
- Divide and flavor the dough:
- Split the dough into three equal portions by weight if possible, then work the cocoa powder into one bowl, the strawberry extract and food coloring into the second, and leave the third completely plain for your vanilla layer.
- Layer the doughs:
- Press the chocolate dough evenly across the bottom of your prepared pan using an offset spatula, then carefully spread the vanilla dough over it, and finish with the strawberry layer on top, smoothing each one as flat and even as you can manage.
- Bake until just set:
- Slide the pan into the oven for 12 to 15 minutes, watching closely near the end because you want the layers set but still slightly soft to the touch, not browned or dry around the edges.
- Cool, slice, and garnish:
- Let the slab cool completely in the pan on a wire rack, then use the parchment overhang to lift it out, cut into bars or squares, and drizzle with melted chocolate and sprinkles if you are feeling festive.
 Save
Save One rainy afternoon I wrapped a dozen of these in wax paper and tucked them into my daughters lunchbox with a little note. She came home and told me her best friend traded an entire sandwich for just two squares. That small bartering victory told me everything I needed to know about how good these really are.
Getting the Layers Right
The most common stumbling block is uneven layers that bake into lopsided bars. Use your offset spatula dipped in warm water to smooth each layer, and the slight moisture actually helps the next layer adhere without creating air pockets. Work somewhat quickly though, because cold dough resists spreading and tears the layer beneath it.
Customizing for Any Occasion
You can swap the strawberry extract for lemon or orange and adjust the food coloring accordingly to match holidays, birthdays, or school colors. I once made a green mint layer for a Christmas party and people assumed I had bought them from a professional bakery. The chocolate drizzle on top is where you can really get creative with patterns, zigzags, or even a simple dusting of powdered sugar if you are short on time.
Storing and Serving
These bars stay beautifully soft for up to five days when stored in an airtight container at room temperature, and they actually taste better on day two once the flavors have had time to mingle. You can also freeze the entire unsliced slab wrapped tightly in plastic for up to two months, then thaw overnight before cutting.
- Always cut with a sharp knife wiped clean between slices for the neatest edges.
- Chill the slab for 30 minutes before slicing if the layers feel too soft or sticky.
- Let them come fully to room temperature before serving so the butter softens and the texture is at its best.
 Save
Save Every time I make these cookies, someone asks for the recipe, and I always say the same thing: trust the layers, be patient with the spreading, and never skip the parchment paper. They are a little bit of effort for a whole lot of joy.
Common Recipe Questions
- → Can I freeze Neapolitan cookies?
-
Yes, these cookies freeze well for up to 3 months. Wrap them tightly in plastic wrap, then place in a freezer-safe container. Thaw at room temperature for about an hour before serving.
- → Why did my layers blend together?
-
Layers may mix if the dough is too soft or pressed too aggressively. Chill each layer briefly before adding the next, and use gentle, even pressure with an offset spatula to spread the dough.
- → Can I use natural food coloring instead of gel?
-
Absolutely. Natural food coloring works fine, though you may need a bit more to achieve vibrant results. Gel coloring is preferred because it provides intense color without adding liquid to the dough.
- → What can I substitute for strawberry extract?
-
You can use raspberry extract or almond extract for a different flavor profile. Alternatively, reduce some strawberry jam and incorporate it, though this will add slight sweetness and moisture to the dough.
- → How do I get clean, even slices?
-
Ensure the cookies are completely cooled before cutting. Use a sharp knife and wipe it clean between cuts. For the neatest results, chill the slab in the refrigerator for 30 minutes before slicing.
- → Can I make the dough ahead of time?
-
Yes, the dough can be prepared and refrigerated for up to 2 days before assembling and baking. Wrap each portion tightly in plastic wrap and let it soften slightly at room temperature before pressing into the pan.
