 Save
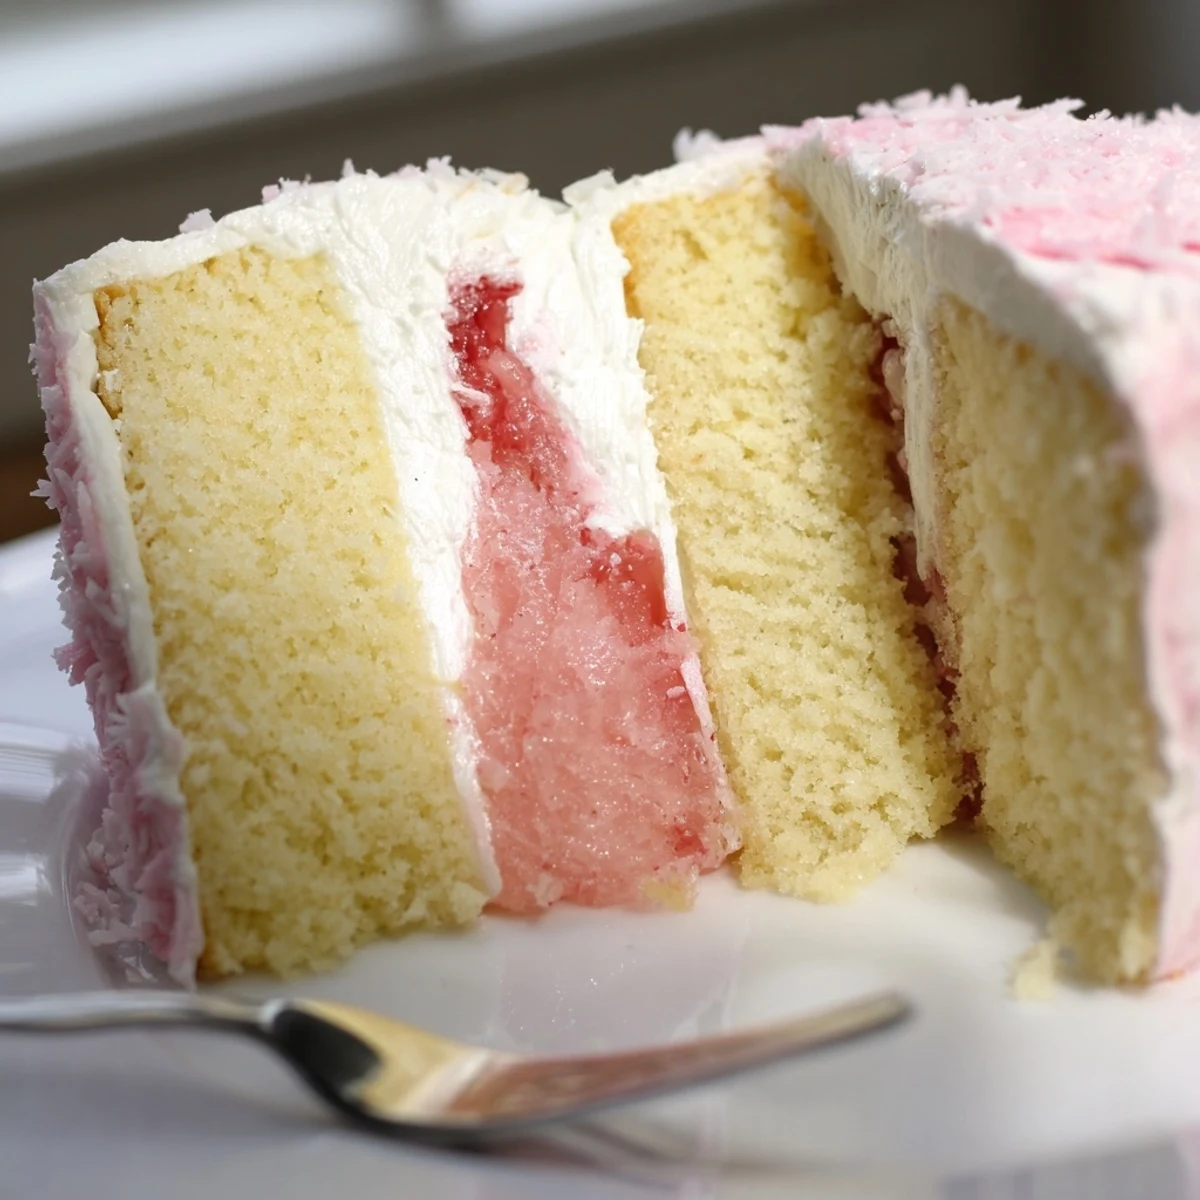
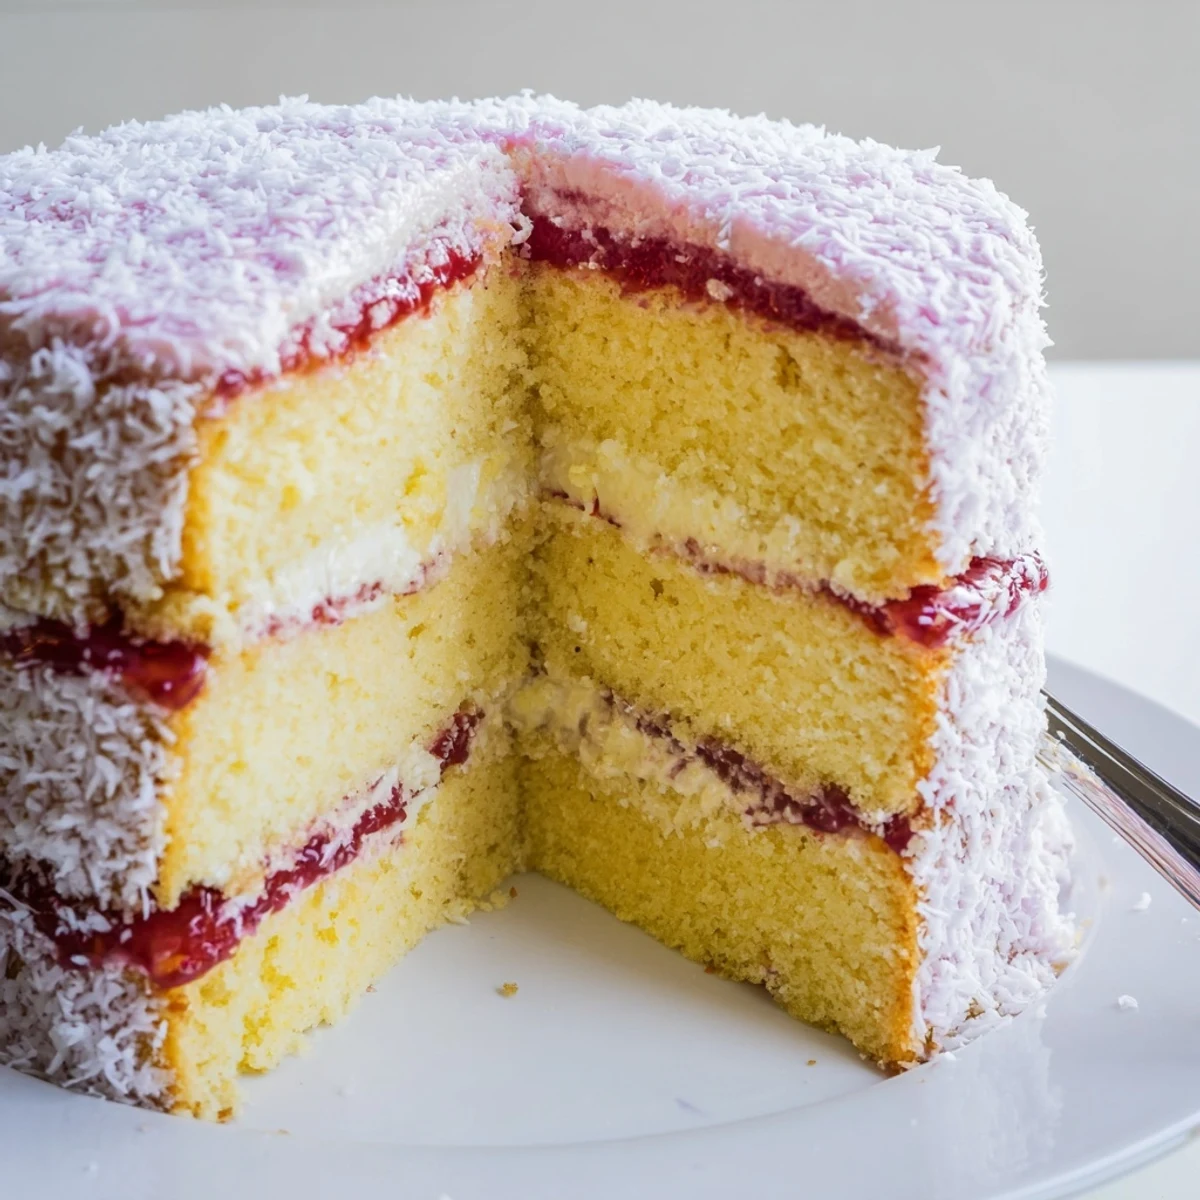
Save Old fashioned pink jelly cakes are light sponge squares sandwiched with whipped cream, dipped in semi-set raspberry jelly and rolled in desiccated coconut. Start with a tender butter sponge, slice into even squares, whip cream to firm peaks, and coat each sandwiched pair while the jelly is just set to ensure an even glaze. Chill to firm the jelly and set the coconut. Variations include passionfruit or orange jelly, and swapping coconut cream for a dairy-free filling.
My nan kept a tin of pink jelly cakes on her kitchen bench every Saturday and my sister and I would fight over the last one before lunchtime even arrived. Something about that soft coconut coating and the wobble of jelly against cream felt like edible magic when you are seven years old. I burnt my first batch of sponge at twenty two because I got distracted watching a cricket match and learned that oven timing is not something you guess at.
I made a triple batch for my friends engagement party last spring and watched a room full of grown adults abandon their wine glasses to hover around the dessert table. My mate Dave ate four in a row and then pretended he had no idea where they went. The tray was empty within twenty minutes and someone actually asked if I had hidden more in the fridge.
Ingredients
- Unsalted butter 125 g softened: Room temperature butter creams properly and gives you that light airy texture so pull it out of the fridge an hour before you start.
- Caster sugar 125 g: The fine grains dissolve faster than regular sugar which keeps your batter smooth and lump free.
- Large eggs 2: Eggs at room temperature incorporate more evenly into the batter and help the sponge rise evenly.
- Vanilla extract 1 tsp: A good quality extract adds warmth to the sponge without overpowering the jelly flavour later.
- Self raising flour 180 g sifted: Sifting is not optional here because it aerates the flour and prevents dense pockets in your sponge.
- Milk 100 ml: Whole milk gives the best crumb but any milk you have on hand will work in a pinch.
- Raspberry or strawberry jelly crystals 1 packet 85 g: Raspberry is the classic choice and that bright pink colour is iconic but strawberry is equally delicious.
- Boiling water 250 ml: Dissolves the jelly crystals completely so you get a smooth even set on every cake.
- Cold water 150 ml: Brings the jelly temperature down quickly so it starts setting at the right pace for dipping.
- Thickened cream 200 ml: Thickened or heavy cream whips to firm peaks and holds its shape inside the cakes without oozing out.
- Icing sugar 1 tbsp: Just enough to sweeten the cream without making it cloying.
- Vanilla extract half tsp for cream: A second hit of vanilla in the filling ties the whole flavour together beautifully.
- Desiccated coconut 100 g: This is what makes them look like proper jelly cakes so do not skip it or skimp on it.
Instructions
- Preheat and prepare your tin:
- Set your oven to 180 degrees Celsius or 350 degrees Fahrenheit. Grease a 20 by 30 centimetre baking tin and line it with baking paper so the sponge lifts out cleanly.
- Cream butter and sugar until dreamy:
- Beat the softened butter and caster sugar together with an electric mixer until the mixture turns pale and looks fluffy like buttercream. This usually takes about three to four minutes and you will hear the change in sound when it is ready.
- Add eggs and vanilla:
- Drop in one egg at a time and beat well after each addition so the batter does not curdle. Pour in the vanilla extract and give it one more good mix until everything looks glossy and combined.
- Fold in flour and milk gently:
- Alternately fold the sifted flour and milk into the batter using a large spoon or spatula. Stop as soon as you see the last streak of flour disappear because overmixing will make the sponge tough.
- Bake the sponge:
- Spread the batter evenly into your prepared tin and smooth the top. Bake for 12 to 15 minutes until the sponge is golden and a skewer poked into the centre comes out clean.
- Cool the sponge completely:
- Let the sponge sit in the tin for 10 minutes to firm up then turn it out onto a wire rack. It must be completely cold before you cut it or the jelly will melt right off later.
- Prepare the jelly:
- While the sponge cools dissolve the jelly crystals in boiling water and stir until no grains remain. Add the cold water then pour the mixture into a shallow dish and refrigerate for about 45 to 60 minutes until it is just beginning to set but still liquid enough to coat a cake.
- Cut and fill the cakes:
- Cut the cold sponge into 24 equal squares. Whip the cream with icing sugar and vanilla until it holds firm peaks then sandwich pairs of sponge squares together with a generous spoonful of cream.
- Dip in jelly and roll in coconut:
- Working quickly dip each sandwiched cake into the semi set jelly coating all six sides and letting the excess drip back into the dish. Roll immediately in desiccated coconut pressing gently so it sticks then place each cake on a wire rack.
- Chill and serve:
- Refrigerate the finished cakes for at least 30 minutes so the jelly sets firmly and the cream chills through. Serve them cold and watch them disappear.
 Save
Save I brought a plate of these to a neighbours housewarming once and she told me they were exactly like the ones her mother used to sell at the school canteen in Brisbane. We stood in her kitchen eating them over the sink and she got a bit misty about it.
Choosing Your Jelly Flavour
Raspberry is traditional and gives you that unmistakable pink colour but I have tried passionfruit jelly on a whim and it was a revelation. Orange jelly makes them taste like a sunny morning and strawberry keeps everyone happy when you are cooking for kids. The beauty of this recipe is that the sponge and cream are a blank canvas so pick whatever jelly makes you smile.
Handling The Sponge Gently
The most common mistake is rushing the cooling step because warm sponge plus cold jelly equals a slippery disaster. I once tried to speed things up by putting the sponge in the freezer and ended up with a weirdly dense texture that no amount of coconut could hide. Let it cool naturally on the rack and you will be rewarded with a cake that holds together beautifully during dipping.
Serving And Storing Your Jelly Cakes
Arrange them on a clean white plate and they look like something out of a bakery window. They need to stay refrigerated until serving because the cream and jelly both soften at room temperature. If you are making them for an event prepare everything else first and dip the cakes no more than a few hours ahead.
- Cover leftovers loosely with plastic wrap in the fridge but honestly leftovers are rare.
- You can freeze the unfilled sponge squares for up to a month and assemble them later.
- Always remember that the coconut goes on while the jelly is still wet or it will not stick at all.
 Save
Save Every time I make these I think of my nan and that old biscuit tin on her bench and somehow they still taste exactly like being seven and happy on a Saturday afternoon.
Common Recipe Questions
- → How can I tell when the sponge is done baking?
-
Insert a skewer into the center; it should come out clean and the sponge should spring back lightly to the touch. Allow the tray cake to cool in the tin briefly before transferring to a wire rack to cool completely.
- → What’s the best method for getting the jelly to the right consistency for coating?
-
Dissolve the jelly crystals in boiling water, then chill in a shallow dish until it becomes tacky but still pourable (about 45–60 minutes). Work quickly when dipping so the jelly adheres and sets evenly.
- → Can I make a dairy-free version?
-
Yes — use a plant-based spread in the sponge and whip chilled coconut cream to firm peaks for the filling. Choose a coconut cream with adequate fat for stable whipping.
- → How do I cut even sponge squares without tearing?
-
Cool the sponge completely, then use a sharp knife or a serrated blade and steady, single strokes. A ruler or straight edge helps mark equal portions before cutting.
- → Why does the jelly sometimes slide off the cakes?
-
If the jelly is too loose it won’t cling. Dip while the jelly is semi-set, let excess drip off on a wire rack, and roll immediately in desiccated coconut so the glaze adheres.
- → Can these be prepared ahead and how should they be stored?
-
Assemble and chill for at least 30 minutes to let the jelly firm. Store in a single layer in the refrigerator and consume within a day for best texture and freshness.
